
How I Light A Smoker Using My 3 Step Technique: Heat, Fuel And Cool
- Laurence Edwards

- Dec 13, 2025
- 7 min read

If you cannot light a smoker properly, everything else in beekeeping gets harder. Your bees are jumpier, inspections are rushed, and you end up dreading going through certain colonies. When your smoker is reliable, you buy yourself time, calm and control.
Over the years I have tried pretty much every trick going. What I use now is a simple three step method that works, every time: Heat, Fuel and Cool. It is easy to remember, easy to teach, and once you get the feel for it you will have a cool, dense smoke on tap whenever you need it.
In this blog I will explain why we use smoke at all, then walk you through my three step technique so you can light your smoker confidently every time.
Why We Use A Smoker In The First Place
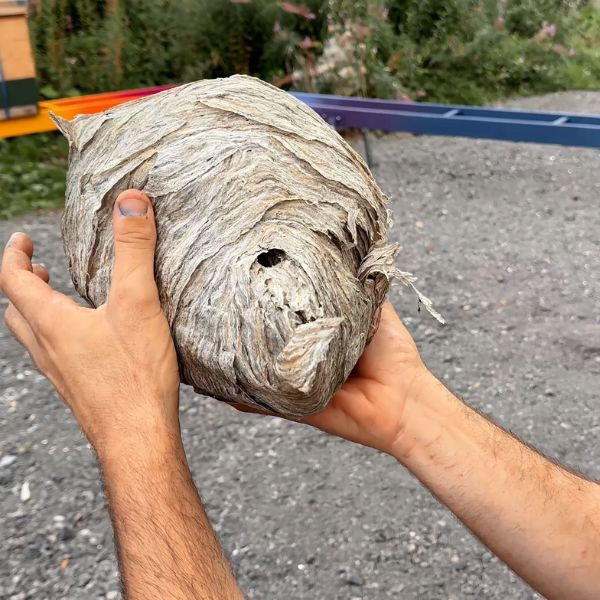
When you crack open a hive, the bees are not always happy about it. They communicate danger using alarm pheromones. If enough guard bees start pumping out alarm scent, the whole colony can switch from relaxed to defensive very quickly.
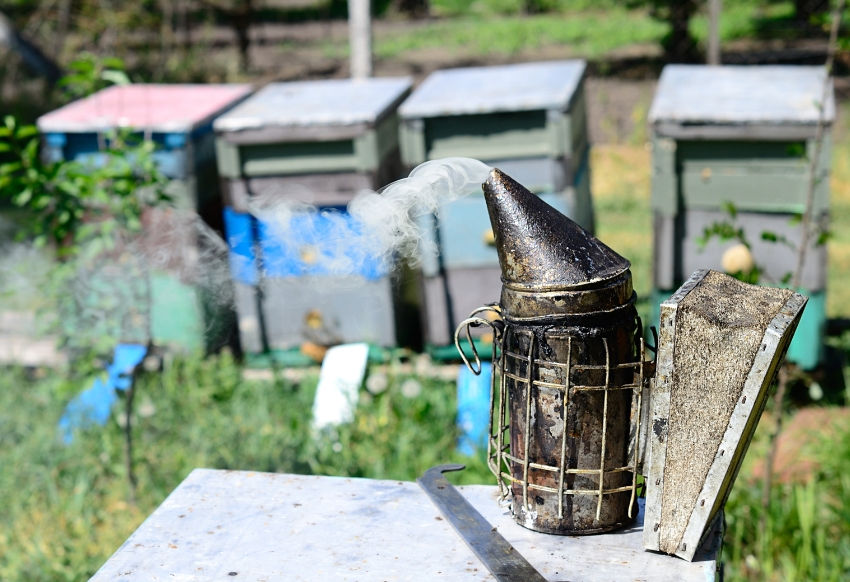
Cool, white smoker smoke helps to mask those pheromones and keep the colony calm and easy to manage.
The aim is not to blast bees with hot smoke. The aim is to create a steady supply of cool, gentle smoke that you can use sparingly at the entrance and over the top bars to keep the colony settled while you work. Used like that, a smoker becomes one of the most important safety tools in your kit.

How To Light A Smoker - The Three Step Method: Heat, Fuel And Cool
Almost every smoker problem comes down to one of three things. The base fire is weak. The fuel is wrong for the job. The smoke is too hot and harsh.
My method tackles those in order. I always think in three layers inside the smoker. Heat is a strong, reliable ignition layer at the bottom. Fuel is the main charge of slow burning material that gives me long, steady smoke. Cool is a grass bung at the top to cool and soften the smoke before it reaches the bees.
Once you get into the habit of building these three layers, you will find your smoker lights faster, stays lit longer and gives you the kind of smoke that calms bees instead of winding them up.

Step 1: Heat – Build A Reliable Ignition Base
The bottom layer is all about heat. I want something that catches easily and gives me a concentrated, bright core of fire that will light my main fuel properly.
Good options for the Heat layer include corrugated cardboard, rolled or folded, a twist of untreated brown card, or a small plug of wire wool as a very reliable base for intense heat.

I start by dropping a small amount of my heat material into the bottom of the smoker. I light it properly with a lighter or blowtorch and then work the bellows. I am not interested in a quick flash of flame that dies as soon as I look away. I want it properly alight so that when I add the main fuel it will keep burning through.
At this stage it is fine to have visible flames. The smoker body is still almost empty and the fire needs oxygen. I keep puffing until I can see that the heat layer would stay burning even if I stopped for a little while.
If you struggle at this point, you will struggle all the way through. Take a few extra seconds to build a strong ignition base and the rest becomes much easier.

Step 2: Fuel – Add Long Burning Lavender Pellets
Once the heat layer is established, I move to the main fuel layer. This is what actually keeps the smoker going for the next hour while you inspect.
You can use many different fuels. Beekeepers in the UK use things like hessian, pine cones, wood shavings, dried lavender stems, cardboard and all sorts of proprietary smoker fuels. The key qualities I look for are that it must burn slowly and steadily, it must produce cool, white or light grey smoke, and it should not spark, spit or throw off hot bits that can burn bees or kit.
My personal favourite is lavender wood pellets. I find they give a cool, consistent smoke, they smell great in the apiary, and they are easy to store and handle. I pour a small handful of pellets directly onto the burning heat layer, then puff hard on the bellows. The aim here is to get those first pellets burning strongly.

Once the first handful is clearly lit, I add more pellets in small batches, always puffing between additions. I am building up a column of smouldering fuel, not dumping a whole bag in one go. If you add too much too quickly you smother the fire, the smoker goes out and you are back to square one.
I keep going until the firebox has about an inch worth of pellets on top of the smouldering cardboard. I then apply more flames to the top and puff the bellow to drive air through. You want to REALLY increase the temperature here so the pellets are burning well and will not go out when you close the lid and restrict the oxygen supply.

Step 3: Cool – Use A Grass Bung To Soften The Smoke
With the fuel layer sorted, the last step is to control the temperature and texture of the smoke that actually reaches the bees. This is where the Cool layer comes in.
Hot, aggressive smoke is one of the fastest ways to upset a colony. What we want is cool, dense smoke that rolls gently across the top bars and entrance. To get that, I use a simple grass bung.
I grab a handful of fresh grass, fold or twist it into a loose plug and place it on top of the burning fuel before I close the lid. The grass acts like a filter and a cooler. The smoke has to move through that damp, green layer before it leaves the spout, which knocks the edge off the heat and gives a much softer output.
If the smoker starts to get a bit hot or aggressive, I refresh the grass bung and give it a few steady puffs until the smoke looks and feels right again.
When I am finished in the apiary, I also use a tight grass bung to choke the smoker and starve the fire of oxygen. That, combined with a safe place to cool down, helps prevent stray embers and reduces fire risk.

How I Use The Smoker During An Inspection
Once the smoker is going properly with Heat, Fuel and Cool in place, I keep the use during inspections very simple.
Before I open a hive, I put a few gentle puffs at the entrance and wait a short while. When I remove the roof and crownboard, I direct a small amount of smoke across the top bars, not straight down into the cluster. If the bees are calm, I often do not need to use much more than that.
If a colony starts to get defensive during the inspection, I step back, give them a couple of extra puffs and slow myself down. The smoker is there to buy you breathing space so you do not start rushing and making mistakes.
Over smoking is just as bad as not smoking at all. If you constantly blast bees with hot smoke you can actually drive them up and out of the hive and make them more defensive. Used lightly and correctly, a smoker should settle a colony, not chase it around the apiary.

Common Smoker Problems And How This Method Fixes Them
Most of the smoker complaints I hear fall into a few simple categories.
If the smoker keeps going out, it is usually because the Heat layer was not strong enough or the Fuel was added too quickly and smothered the fire. Taking time to build a really solid ignition base and adding fuel gradually fixes that.
If the smoke is too hot or harsh, it is usually because there is not enough Cool layer, or the smoker has been allowed to run almost empty on fuel so the remaining fire is concentrated in a small hot spot. Adding a fresh grass bung and topping up the fuel, then puffing until the smoke softens, usually brings it back under control.
If the smoker tunnels, with the fire running up one side and leaving the rest unburnt, it often means the fuel was packed too tightly on one side and has not lit evenly. When you add fuel in small batches on top of a broad, established Heat layer, you get a more even burn.
The nice thing about thinking in terms of Heat, Fuel and Cool is that you always know which layer to tweak when something does not feel right.

Safety, Neighbours And Good Habits
A smoker is a fire in a metal box and it deserves respect.
I always light my smoker in a safe area away from dry vegetation, have a bucket of water or an extinguisher nearby, and never leave a lit smoker in the back of a car or on top of a hive roof where it can melt kit or start a fire. At the end of an apiary session I choke it properly with a grass bung, then empty the contents into a non flammable container once everything is cold.
It is also worth being considerate with smoke around houses and public paths. Use the minimum amount you need to keep the bees calm, and think about wind direction so you are not pumping smoke straight at your neighbour’s garden.

Watch Next: My Smoker Videos
If you want to see this all in action, these two videos from my channel are a great next step.
Recommended Playlist: Smokers
If you want everything in one place, this is the most relevant playlist from my library for this topic.
See This On Social
For a quick snapshot of smoker fuels in real life, here is a Facebook post where I asked what everyone uses and showed a smoker running for hours on a single burn.
Bringing It All Together
Lighting a smoker should not feel like a dark art. Once you break it down into Heat, Fuel and Cool, it becomes a simple system you can repeat every time you go to the apiary. Build a strong ignition base. Add a good quality main fuel like lavender wood pellets in stages. Finish with a grass bung to cool and soften the smoke. Used like that, the smoker becomes a calm, reliable tool instead of a source of stress.

If you want structured, step by step training that covers core skills like smoker use, hive inspections, swarm control and year round colony management in the UK, you can learn more inside my 14 Day Beekeeper online training here:


Comments