How To Mark A Queen Bee
- Laurence Edwards

- Feb 7
- 6 min read

Marking a queen bee is one of those small jobs that makes a huge difference to your
beekeeping. Once you know how to mark a queen safely and confidently, everything from finding her on a busy frame to tracking her age and performance becomes much easier.
In this blog I will walk you through exactly how I mark a mated queen, the tools I use, and some simple tips to help you avoid common mistakes. If you have ever thought “I can never find my queen” or “I am too nervous about hurting her”, this guide is for you.
With a calm approach and the right technique, marking a queen bee becomes a quick and stress free part of your inspections.

Why I Mark My Queens
There are three main reasons I mark almost every mated queen I work with.
First, a marked queen is much easier to find, especially in a strong colony with several frames of brood and bees. That bright dot on the thorax stands out and saves you valuable time during inspections.
Second, marking a mated queen allows you to track her age and performance over several seasons. If you follow the standard colour code, you can see at a glance how old she is and whether it is time to think about replacing her.
Third, a marked queen gives you confidence. When you know exactly where she is, you can manipulate brood frames, shake bees, or make splits with far less stress. Instead of worrying that you might squash her, you can see her clearly and work around her.
For new beekeepers this confidence is a big step forward.
The Kit I Use For Marking Queens
You do not need a huge amount of specialist kit to get started, but having the right tools makes the process smoother and safer for both you and the queen.
Here is what I use when I am marking a queen bee.
A simple crown of thornes style cage
A brightly coloured oil based paint pen
In terms of pens, I like to use good quality oil based paint markers.
TOMA pens work very well and I also use graffiti style oil paint pens that come in a wide range of colours.
For me, the best pens for queen marking are ones that give you a tiny controlled dot of paint, dry quickly, and do not flake off after a few weeks on the queen. Whatever brand you choose, test the pen first on a scrap surface so you know how much paint is coming out.
You want a thin, even dot rather than a blob. Always shake the pen well and prime it away from the bees before you go anywhere near the queen.

Step By Step: How To Mark A Queen Bee
There are lots of ways to mark a queen, but this is the simple step by step process I use and teach.
Once you have done it a few times it becomes a quick, repeatable routine.
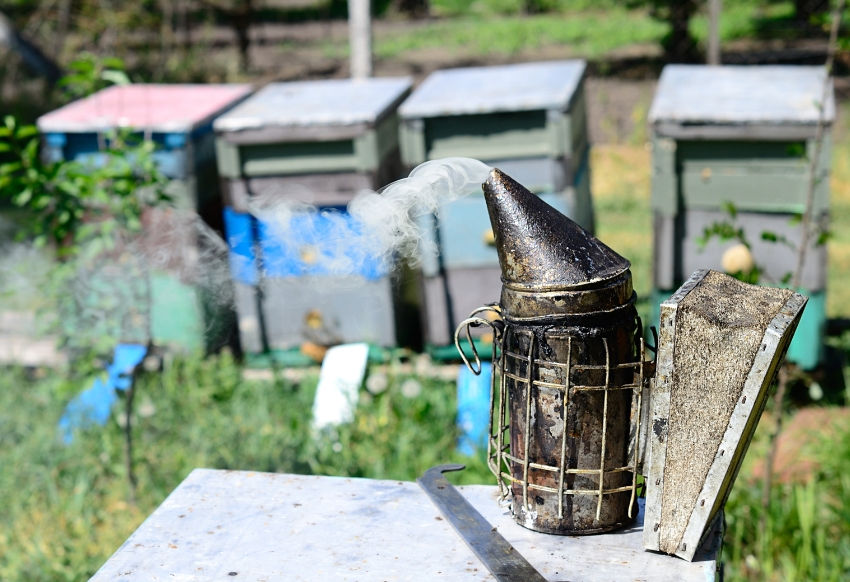
Prepare your hive and your smoker before you start. Work on a warm, calm day when the bees are flying and the colony is relaxed.
Work through the brood box methodically until you find the queen. Take your time, keep the frames over the brood box, and avoid rushing.
Once you have found her, gently place her under the cage. Make sure her legs and wings are not trapped and try to isolate her as best as possible from other bees.
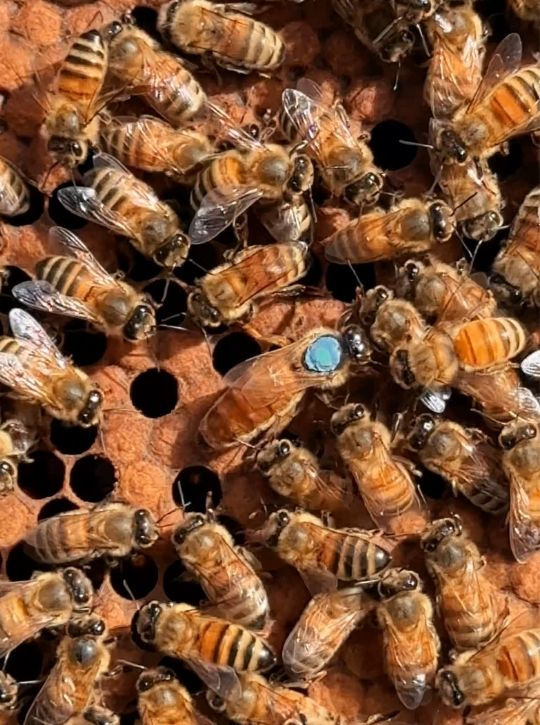
Take your queen marking pen and touch a tiny dot of paint onto the centre of the thorax. This is the flat section between the head and the abdomen. Avoid the eyes, wings, and abdomen.
Hold the queen in the cage for a short time to allow the paint to dry. I like to give it at least 30 to 60 seconds, longer if it is cool or damp.
Once you are happy the paint is dry, release the queen back onto a frame with plenty of workers. Watch her walk normally for a few moments and check that the bees are accepting her.

If you are nervous about handling a queen for the first time, practise with drones.
They are bigger, more forgiving, and if something goes wrong it is far less serious than if you injure your best breeder queen. The handling skills are the same and a few practice runs on drones can transform your confidence.
Colour Codes And Tracking Queen Age
Many beekeepers follow the international queen marking colour system so they can tell the year of a queen at a glance.
Each year is linked to a particular colour in a repeating five year cycle.
You do not have to follow this system, but it is very useful once you start running more than a handful of colonies.
Even if you choose your own colours, be consistent.
Decide which colour you will use each year or for each line of queens and stick to it.
That way, when you come back to a hive in two or three seasons, you can tell straight away whether you are still looking at the original queen or one of her daughters.
For breeding and selection, this is incredibly helpful.
If you are buying in high quality mated queens or raising your own, a clear and consistent marking system helps you track performance traits such as brood pattern, temperament, and honey production over time.

Common Mistakes When Marking A Mated Queen
Most problems with queen marking come from rushing or from using too much paint.
These are some of the common mistakes I see and how you can avoid them.
Putting on too much paint so it runs down the side of the thorax or onto the wings.
Allowing wet paint to smear onto the eyes, legs, or abdomen.
Releasing the queen too quickly before the paint has dried and letting the workers try to clean it off.
Marking on a cold or windy day when the bees are already defensive and stressed.
The fix for all of these is simple.
Slow down, use a cage, and remember that less paint is better than more.
A tiny neat dot is all you need.
If in doubt, stop and try again another day rather than forcing it in bad conditions.
If you do accidentally get paint in the wrong place, do not panic. Watch how the queen behaves. If she is walking normally and the workers are treating her as usual, you can often leave her and see how she looks at the next inspection. If she is clearly injured or the bees are balling her, you may need to intervene and consider requeening the colony.

Building Confidence With Queen Handling
Queen marking is as much about your body language as it is about the tools you use.
If you are tense, rushed, or worried, the bees pick up on it and everything feels harder.
A calm, deliberate approach makes the process smoother for everyone.
Here are a few simple tips that help build your confidence when marking a queen bee.
Start with your calmest colonies and your nicest queens.
Do not begin with the angriest hive in the apiary.
Practise picking up drones and placing them into a marking cage before you ever work with your best breeder queen.
Work over the open hive so that if the queen does escape she falls back into her own colony instead of onto the ground.
Keep all your marking kit in one box so you are never hunting for a pen or cage while holding a queen.
Over time, queen handling becomes second nature.
Marking a mated queen, clipping her, or moving her into another colony are all skills that get easier every season.
The key is to have a method that you trust and to follow it the same way every time.

Further Watching And Resources
If you want to see this process in real time, here are some useful videos and resources to explore next.
How To Mark Queen Bees | Simple Techniques for Fast and Safe Queen Marking -
Best Pens To Mark Queens - Why I Stopped Using Posca Markers -
Used together, these resources will help you build a simple repeatable system for marking queens, tracking performance, and keeping your colonies calm, productive, and easy to manage year after year.


I love how clearly the process is broken down here, especially for beginners who feel nervous about handling a queen bee. When I first tried something hands-on like this in a workshop, I was so tense that even simple steps felt complicated. It reminds me how people sometimes look for easier routes, like hire someone to do my class for me, when confidence is low. But with practice and patience, these skills really do become second nature over time.
Very helpful information very well written