top of page

Adam's Apiaries: How To Build An Underfloor Entrance

How to build an underfloor entrance
A fully assembled under floor entrance

Do you want to discover how to build an underfloor entrance for your beehive? This blog post will detail the full process on how to build an underfloor entrance from start to finish.


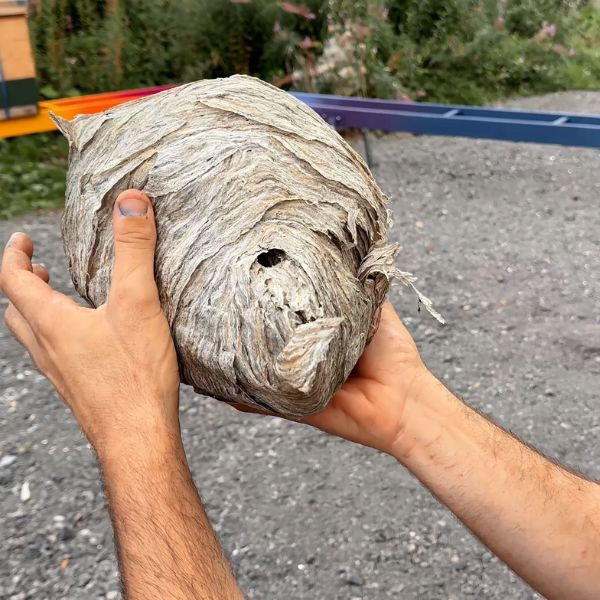
When I took on the new apiary last year I was warned there was a large headache that came with the site - wasps! Always looking for something to solve a issue and and save a little money I needed something to assist with the problem, along with giving me some new floors that were needed.


My mentor was the first to tell me about the under floor entrance and gave me a copy of a magazine that had an article about them. Being slightly younger and knowing that the internet can provide all these days, it wasn't long before I found the BMH video on the same thing, so with 2 reliable sources of information I set to the task of building some underfloor entrances.


As we head into another season and I have need for further hives, another batch of floors is needed. Having seen recent posts on Facebook about the under floor entrance and with lots of interest from people, I thought this would be a good opportunity for me to talk you through just how simple these are to build.


Why under floor entrances?


As I have previously mentioned, wasps are a real pain to beekeepers, so with only a single bee space (8mm) as an entrance, this gives gives the bees an easier to defend entrance. Another issue that is overcome is the need for mouse guards as the narrow entrance will mean that it is next to impossible for them to get in. With many people having out apiaries, having equipment that stacks for transport and storage is a great thing, yet another plus for these floors is the integrated landing board within the footprint of the hive. Lastly, they are cheap and easy to build!


So here it is, my very own Ikea under floor entrance. What I will say at this point, I am using what wood I have left over from a fencing job! You really can use what you have to hand, but if you're getting timber in then I would go for a 4 inch gravel board. This is what was used for the last batch I made. All you need to remember is that your finished floor needs to be the same size as your brood box and remember measure twice and cut once!!


Components for an underfloor entrance

As with any equipment that you make yourself, there can be variations, this batch will be made with varroa trays.


Parts List


A. Varroa tray and mesh

B. Varroa tray runners

C. Back Bar

D. Front Vertical

E. Landing board and Front top.

F. Side Bars

G. 8mm spacer.


As I'm building for commercial brood boxes the measurement I am aiming for is 465mm, therefore part F is required to be 465mm long with any parts that will need to go between (C,D &E) will need to be 465mm - the width of 2 lengths of F (side bars). This way you will end up at the correct width and length. If you are building for Nationals, just replace the 465mm dimension with 460mm.


If you do not require Varroa slides under your hive then all you will require is 2 x D, 2 and 2 x F.

(see Black mountain Honey video lower in this blog)


How I put my underfloor entrances together


Screw and glue the landing board to the front vertical D to E

If your attaching thicker wood to thinner, like we are here it pays to pre-drill the wood it will help to stop the wood splitting. Once you have attached the front vertical and the landing board together you can set this to one side. Take you two side bars (F), back bar (C) and the front top (E). Lay these out as below and fix them in place, these need to be flush with the ends and face of the side bars.


Insure that these are attached flush on the end and face of the side bars.
Ensure that these are attached flush on the end and face of the side bars

Starting to come together.
Starting to come together

Now take the landing board and front vertical that was fixed together earlier and slot it in upfront. Take your 8mm spacer to insure that you leave a bee space so the bees can come and go. An M8 bolt or mm drill bit will have the same affect, screw this all in place nice and tight.


The 8mm spacer is the most important part when Building the floor.
The 8mm spacer is the most important part when Building the floor

Looking at the picture below you can see that the 2 varroa tray runners have been installed.


The entrance can be offset as far as you like

Fix the varroa mesh to the floor ensuring that you don't cover the entrance. I use 18g staples in my nail gun to fix them in place, but several small screws will also work well. I also like to cut the varroa mesh so the brood box is sitting straight onto the wood.


Perfecto.
Perfecto
The view from the backThe view from the back
The view from the back

Varroa tray is slid in, fixing a line of wood to the rear of the board will give you something to get hold off, you can also turn it the other way up to seal the floor up. Below you will see the link to Laurence's great video showing all the different variations on building the floors along with some great stills and pictures showing dimensions.


Detailed below are the cutting plans from the video for anyone who is making these for national hives:

How to build and underfloor entrance

How to build and underfloor entrance


Comments

Rated 0 out of 5 stars.
No ratings yet

Add a rating
Mountains

Subscribe to our newsletter

Get latest offers, deals and news directly to your inbox!

Discover the Buzz - Our latest blog articles!

Why This Swarm Died In The Box?

Over Christmas I was having a tidy up, moving stacks of boxes around, when I noticed something that caught my eye... Inside a stack of stored equipment, I found a dead colony of bees. Whenever you find a dead colony, the first thing you should do is not panic. The second thing you should do is investigate properly. So I decided to do a full dead swarm autopsy and work out exactly what had happened. The Configuration Was a Disaster Before even looking inside, the setup itself told a story....

Why Cold Weather Might Be A Blessing For Your Bees

Most beekeepers see snow and frost and immediately worry that their bees are going to starve or struggle. But in the UK in particular, cold weather is usually not the enemy. In fact, cold weather can be a blessing for your bees and can be one of the best things for a colony because it makes winter predictable, and predictable winter is what stops colonies quietly burning through stores and ending up in trouble. In this blog I am going to explain why cold weather helps, what the real winter...

Use A Hard Frost To Kill Wax Moth In Stored Frames With No Chemicals

Wax moth can absolutely ruin a stack of stored brood comb and what makes it worse is that most people only react once they spot the damage, by which point the frames are already on the way out. I want to show you a simple winter trick that costs nothing, uses no chemicals, and works brilliantly if you get a proper hard frost. This is one of those rare moments in beekeeping where nature hands you a free solution. You just have to use it properly. Killing wax moth In a good colony, wax moth is...

How To Mark A Queen Bee

Marking a queen bee is one of those small jobs that makes a huge difference to your beekeeping. Once you know how to mark a queen safely and confidently, everything from finding her on a busy frame to tracking her age and performance becomes much easier. In this blog I will walk you through exactly how I mark a mated queen, the tools I use, and some simple tips to help you avoid common mistakes. If you have ever thought “I can never find my queen” or “I am too nervous about hurting her”,...

A Look Inside An Old Abandoned Wasps Nest

Explore the fascinating structure of an old abandoned wasps nest. Discover insights on wasps nest dynamics and learn how to protect your bees.

How To Light A Bee Smoker - Heat, Fuel and Cool

Discover how to light a bee smoker effectively with our step-by-step guide. Ensure your smoker stays lit for calm, safe bee inspections.

How To Scorch, Clean and Sterilise  Beehives
How To Scorch, Clean and Sterilise Beehives

Learn how to clean beehives effectively to keep your bees healthy. Discover step-by-step methods on how to clean beehives and protect your colonies.

How I Extract Honey From Honeycomb

Discover how to extract honey with ease using my methods at Black Mountain Honey. Learn how to extract honey efficiently and stress-free.

How To Make Natural Beeswax Firelighters From Old Brood Frames

Old brood frames and scrap beeswax can look like a horrible mess, but there is still a lot of value left in them. Once I have rendered out as much wax as I sensibly can, there is often a pile of darker, lower grade wax that I would never use for candles or cosmetics. Instead of throwing it away, I turn it into simple, natural firelighters. In this guide I will walk you through how I make beeswax firelighters using wood wool and recovered wax from old brood frames. This is not about fancy...

How To Render Beeswax Cappings Into Beeswax Blocks

Beeswax cappings are one of the nicest by products of extracting honey. They look and smell fantastic, they are usually much cleaner than old brood comb, and they give you some of the highest quality wax you will ever get from your bees. A lot of beekeepers scrape them off, let them pile up in a tub and never quite get around to dealing with them. That is a shame, because with a simple process you can turn those sticky cappings into clean wax blocks ready for candles, polishes or swapping in...

How I Time My Varroa Treatment Around A Cold Snap To Kill More Mites

Varroa is still the number one health threat to honey bees in the UK. You feel it in spring when colonies that looked fine in autumn come out weak, slow and virus ridden. One of the biggest improvements I have made in my own beekeeping is learning to time winter oxalic acid treatments around a natural brood break, instead of just picking a random date on the calendar. In this guide I will show you how I use the first proper cold snap as a trigger, apply a simple three week rule and then treat...

How I Light A Smoker Using My 3 Step Technique: Heat, Fuel And Cool

Discover how to light a smoker with ease using my 3-step technique: Heat, Fuel, and Cool. Master how to light a smoker confidently today!

bottom of page