
How To Start Beekeeping
- Laurence Edwards

- Jan 21, 2024
- 13 min read
Updated: Feb 3, 2024
How To Start Beekeeping
In this blog, I am going to answer the question; how to start beekeeping? I will look at what can go wrong and give you a template for success as a first year beekeeper. I will break down each of the sections in sequential order and either provide a step by step guide or link to a video showing you a process on YouTube channel to give you the best chance of learning how to start beekeeping in 2024.

Listen to the bees and let them guide you (Br Adam Quote). My number one piece of advice for you – just enjoy it. Enjoy the calm. Enjoy the storm. When you look back on it, you are either learning or succeeding. Check out the ‘My First Nucleus’ series where I take a single nucleus colony through a full year – HERE.
Preparing for your nucleus colony
Good preparation is crucial to success in your first year. I highly recommend watching my video on HOW TO START BEEKEEPING as it breaks down everything you need to think about prior to getting your bees. It’s a good introduction and prerequisite for the information in this blog.
But in the simplest form, you need to do the following things:
Buy yourself a beehive to give your bees a home. My recommendation here is to buy a starter kit from a reputable supplier with frames and foundation included. Preferably buy a fully assembled kit as it removes any errors in equipment assembly.
I can highly recommend the Abelo assembled poly hives with frames/foundation which you can buy – HERE. Make you buy enough supers. We recommend four supers per hive as a minimum. While you are there it’s also worth buying a SMOKER, HIVE TOOL, GLOVES and make sure you have some suitable footwear, I use AIGLE wellies which you can buy HERE.
The next thing you will need is a good quality bee suit. I can recommend both the standard BBWear suit and the ULTRA suit. The ULTRA suit is significantly better, so if you can afford to, it’s good to invest money here from the outset - BUY HERE. Check out how the suit fares against some angry mongrel bees!
Next up, you will need somewhere to place your bees. Try and find somewhere as far away from people as possible. It just makes things easier if they are away from human traffic. You will then need a stand to place them on. You can either build a stand, use some pallets or buy a purpose made stand – this ONE is my favourite - BUY HERE
If you are buying nucs from Black Mountain Honey (which are available HERE and below) your nuc will arrive with a ventilated screen. You will need something to cover it up when it arrives to stop any rain getting in. You can either buy the solid roof direct from PAYNES, or you can do what we do and just place a piece of ply/insulation board over the vent and place a brick on top.
This post covers the basics but I do recommend watching the HOW TO START BEEKEEPING video as it goes into lots more detail on each of these points. It’s better to be over prepared for your bees.
Introducing your nucleus colony
Today you START BEEKEEPING FOR REAL. So the big day has come around and your nucleus colony has arrived, probably delivered by a very nervous postman! If you are ordering from BMH, your nuc will arrive on a pre 1pm service.
AS SOON AS THE NUC ARRIVES, take the nuc outside and place it In the final resting position of the hive (on the stand) and open the entrance to let the bees fly (bee suit on of course). What is VERY important here is that you place the nuc in the EXACT position of where the beehive will be placed and ensure the entrances face the same way. Once the bees start flying, place a piece of material over the vent hole on top to stop any rain getting in and to stop the warmth getting out. If the weather is cold, the bees may not fly. This is perfectly normal.
Leave the bees for 24-48 hrs to let them get used to their new environment and orientate to their new location. They can stay in their Paynes Poly Nuc for a couple of weeks if needed. You need a nice warm day of 14c plus to move onto the next step.

Once you get the forecast for a warmish, settled day of 14c plus, it’s time to transfer your bees over to their new home. Around midday is best to do this as the bees will be flying and this helps them find their new home.
Take the nuc off the stand and place on the floor. Place the new beehive onto the stand in the exact position of the nuc and make sure the entrance of the beehive faces the same way as the entrance of the nuc did. Remove all the boxes from the beehive and place on the floor, leaving just the floor and brood box in position. Remove 6 x frames from the brood box and place on floor.
Open up the nucleus colony and remove the first frame as carefully as you can. This is the one frame where you can squish the queen so be SUPER careful and take your time. Remove the frame and transfer into the new beehive. It doesn’t matter where you place it (side or centre) but what is important is that all the frames from the nuc are placed into the beehive in the same order. Continue to remove frames from the nuc and place into the beehive. If you see the queen, that’s great but not linger looking for her, she is definitely there.

Once all the frames are transferred, take the nucleus and up turn it over the beehive and with a single bang, tap all remaining bees out of the nuc, into the beehive. Repeat until EVERY SINGLE BEE is out of the nucleus. Do not leave a single bee behind. This is how you ensure the queen is transferred over to the nuc. Make sure there are no spaces left in the brood box in the beehive. It should be completely full of frames and ALL the self-spacing frames should be touching one and other. It should look like THIS.

Once complete take the six surplus brood frames and keep these safe in the nuc. Keep this safe somewhere as you will need it later in the season. It’s perfect for swarm control, catching swarms and making splits.
To complete this manipulation, take your crown board and place this directly over the brood box (no excluder) and then place one empty super on the crown board and over the crown board hole, place an empty feeder. Don’t add syrup at this stage. Replace the roof and sit back and watch all the bees go into their new home. Make sure the old nuc is well out of the way so the bees cannot see it as it will confuse them. That’s it – the bees have been introduced into their new home!
Check out the guide on our website - https://www.blackmountainhoney.co.uk/guides/how-to-look-after-bees
Feeding your nucleus colony
This is the one of the most important aspects of learning how to start beekeeping. If there is sufficient stores in your colony, the weather is 14c plus and the bees are flying, there is no requirement to feed BUT, I still recommend feeding to get the bees started. It accelerates their growth in the spring and means you have a greater buffer of stores for inclement weather.
The feeder is already in place as per the previous steps so all that is needed is to prepare some 1:1 sugar syrup and give this to the bees.
Take a pan of water, measured in 1 x litre increments. Heat to boiling. Remove pan from heat and add 1kg of pure granulated sugar per litre of water. Stir to dissolve and make sure it’s completely dissolved while the mixture is warm. Leave to completely cool. The feed is now ready.
Take the feed to the beehive and VERY CAREFULLY decant syrup into feeder. Don’t spill any (mop up any drops) and place the feeder cover back into position underneath the roof. You don’t need to overfill and little and often is the best way to feed. Aim for 1ltr every 2-4 days. Once they have taken it all down, you can top it back up again. Don’t give them 10 litres at a time as it can be too much. You need to just keep them topped up. Trickle feeding works well here. The video is for for winter but the process is the same. Little and often is the mantra.
Building up your nucleus colony
Your colony will naturally build up over time and feeding syrup will give the bees everything they need. They will gather pollen by themselves and I would avoid feeding pollen sub as its messy and unnecessary. Patience is everything in beekeeping. Enjoy the calm of the build-up process.
Your first inspection
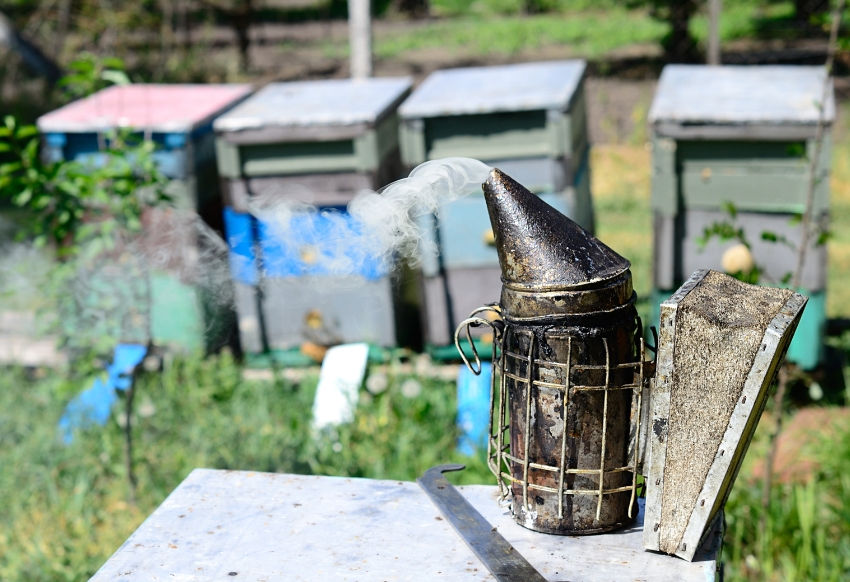
You don’t need to start inspections for the first couple of weeks as there is no risk of the bees swarming so early but after 2 weeks from introduction, it’s time for your very first inspection. I know, this can be daunting but your bee suit will give you all the protection you need. Get your smoker well lit using this video HERE. Get your suit and gloves on. Hive tool at the ready. It’s time for your first inspection.
Give the entrance a couple of puffs of smoke. Then crack open the crown board and puff a bit of smoke into the brood box. Leave for 2 minutes then remove the crown board and remove a single frame of wax foundation without bees on. This just gives you a bit more space to work.
When inspecting bees, always have a think about the reason you are going in to inspect. For your first inspection, there is one reason only. To check the queen is in the colony. That’s it. You don’t even need to see the queen to confirm she has made it across to the beehive. If you see eggs, then you can safely say the queen was transferred across.
Take out of the first frame and have a look for the queen. If you can see the queen, take a look in the centre of the frame and see if you can see eggs. If you see the queen or eggs or worker brood, that’s it, the inspection is complete. If not, continue across all the frames searching for the queen and/or eggs. If you don’t find on the first set of six frames, repeat once to see if you can see them. Fingers crossed you can find her or see some eggs, but don’t fret if not. Eggs are TINY and queens are elusive.
Regardless of whether you see the queen/eggs/brood or not, after two inspections of each frame, close the colony back up as it can stress the bees to keep the hive open for so long. She is almost certainly in there. There is always next week to check again.
Make sure you replace all of the frames in the same order and make sure they are all touching each other. If you leave any gaps, the bees will extend the frames or build brace comb and it becomes really messy.
If you saw the queen or eggs. Well done, you are well on the way to your bees building up nicely throughout the season. If you didn’t see the queen or eggs, don’t fret and try again next week. See if someone can help you inspect or failing that, try and get some photos of your frames (zoomed right in) and send them to another beekeeper (or me) and they will be able to identify eggs/worker brood.
When to stop feeding
Once the colony of bees covers 80% of the frames in the brood box, stop feeding altogether and remove the feeder from the hive. Feeding beyond this will almost certainly cause your bees to swarm. Your bees don’t need to be fed anymore after this point until the end of the season. Your brood box should look something like THIS.
When to add a Queen Excluder
Once you remove your feeder, you can replace it with your queen excluder. This is used to stop the queen accessing the supers above.
When to add your first super
You can add the first super at the same time as adding the queen excluder. You should add only one super at a time but make sure you are always acting ahead of the bees. My rule is that once the super has 8 frames of BEES, you can safely add the next super. If in doubt, add an extra super. If the bees ever run out of space and hit the ceiling, they will swarm and we don’t want our bees swarming and its things very difficult to manage! Check out this video which goes into a bit more detail about when to add supers to your beehives.
Regular inspections
Now your colony is growing and you have a super in place, it’s time to commence regular weekly inspections. Choose a suitable time that you can commit to on a weekly basis. It’s important that the inspections are evenly spaced 7 days apart. Weekend mornings are my preferred time for a weekly inspection.
During your inspections you are looking for three things:
The queen or eggs: During the inspection you are looking for the queen or signs that the queen is still in situ. If you see the queen or eggs, you can place a tick in this box. Seeing capped worker brood is not sufficient at this point due to the time it takes for bees to cap worker brood.
Swarm preparations: This is main reason we inspect every single week. You are looking for the sign of swam preparation. You want to find the signs they are going to swarm before they actually swarm and leave the hive. You do this by looking on every single frame for uncapped swarm cells. Be careful, it’s VERY easy to miss these. I tend to shake all the bees off each frame to ensure I can fully inspect them. Go through every single frame, shake off the bees and check to see if there any uncapped swarm cells. If there are no cells, you can put the frames back together. If you do find uncapped swarm cells, you need to complete an artificial swarm. Check out this video HERE to see the full process.
Disease/Viruses: During every inspection, you should be looking for any signs of disease. Although rare, its good practise to check for disease on every inspection. If you see anything of concern, take a close up picture of the frame (directly from above). Ensure you are signed up to Beebase.com and this will give you access to a seasonal bee inspector who may give you their phone number. You can send the picture for any concerns you may have. It’s rare but it’s good to be prepared!
Don’t be daunted by the inspections. Take your time. Enjoy the process. They get easier every time you do them!
How to make sure your bees don’t swarm?
Weekly inspections are the best way to stop your bees swarming. Inspect them every single week. Shake the bees of every frame and find the uncapped swarm cells before your bees swarm. If you find uncapped cells, this is good news. You caught it in time.
The next part of the puzzle is to ensure your bees always have sufficient space in the beehive. If the colony of bees ever runs out of space and hits the ceiling they will swarm. Giving them space doesn’t mean they won’t swarm, but restricting their space pretty much guarantees they will swarm. You need to stay ahead and make sure the bees have sufficient space for brood and stores at all times.
Check out the guide on our website - https://www.blackmountainhoney.co.uk/guides/how-to-stop-bees-swarming
I found capped swarm cells but the queen is still there?
You got very lucky. Within hours the colony would have swarmed. In this rare instance, it’s best make a small split with the existing queen and some brood into your nuc. Take it to a new apiary and let them build up. With the main hive, choose one good looking queen cell and remove all of the others. If you leave more than one, they may still swarm.
Close the hive back up and don’t go back in for four weeks. In that time, the new queen will emerge, go out and hopefully get mated. After 4 weeks, check to see if the new queen is in the hive and if there are good frames of worker brood, everything has worked. If you find a drone laying queen after 4 weeks, follow the advice in this video HERE to fix the DLQ.
My bees swarmed. Now what?
If you inspect your bees and cant the queen/eggs and there are capped swarm cells, your bees have swarmed. This isn’t ideal but it’s not the end of the world.
You have two separate options:
Remove ALL queens cells and add a mated queen. You can buy our queens HERE - https://www.blackmountainhoney.co.uk/buyqueenbees
Follow the process for introduction HERE - https://www.blackmountainhoney.co.uk/guides/how-to-requeen-a-beehive
Remove all but ONE queen cell and then follow the steps in the previous section of this blog.
Do not just leave the bees to sort it out themselves. They will cast swarm away to nothing and its nearly impossible to recover after multiple cast swarms.
Don’t feel disheartened if your bees swarm. It happens to all if us. Learn from it and try to avoid it happening again.
How to remove a super of honey?
If you manage to avoid your bees swarming, then by the end of the season, you should have a decent crop of honey. Not starts the fun process of removing honey from the beehive and getting it into jars. This deserves a blog post of its own, but in the simplest terms, you need to remove the supers from the beehive without removing any bees.
There are various ways of doing this. You can either blow the bees off the frames with a blower or a much less intrusive method is to use a clearing board with a rhombus escape. THIS video explains the full process of clearing and removing supers from your beehive.
How to extract your honey?
Again, I will cover this in greater detail in a subsequent blog post but there are various methods for extracting. I like the crush and strain method in the first year as it means you don’t need an extractor. Check out the video HERE
Alternatively, you can uncap and extract using an extractor. Check out the video HERE
When to start varroa mite treatments?
We highly recommend that you treat your bees for varroa. We use a product called ApiTraz – available from Abelo HERE. We recommend you extract your honey towards the back end of August/early September and once the honey is removed, move straight into mite treatments. The earlier you do this, the better it is for the bees. The only caveat is that the supers must be removed before you start treatments.
When to start feeding your bees?
As soon as you apply your mite treatments (August/September), we recommend applying a single feed of between 4-6 litres of proprietary feed (invert syrup) – you can buy HERE. This will keep them going as they get ready for winter and ensure they have sufficient feed moving into the winter months. Winter feeding is a fine balance. Too much is bad. Too little is catastrophic. Check out this video HERE to get the balance right.
How to get your bees ready for winter?
So, we have learnt how to start beekeeping, now we need to know to get the bees ready for winter. In terms of the process for getting your bees ready for winter, its quite simple. Give them the right amount of feed and ensure they are treated for varroa. Make sure the queen is properly mated if there was any swarming and ensure there is no disease present. Reduce the entrances down to help against wasp/hornets and then add a mouse guard to stop mice from accessing the beehive. Take a look at this video to see the process in actions.
Conclusion
This guide should give you a template for a successful first beekeeping season. I hope I have given you enough information to help you learn how to start beekeeping. If you have any issues, worries or concerns, feel free to contact me via the website. If there is anything I have missed and you think should be included, drop me a message HERE and I will update accordingly.
I wish you the VERY best of luck in your first beekeeping season. Have fun. Learn lots. Ask questions. Enjoy your bees!


This was such a timely and helpful post for me! 😊 I've been watching so many Netflix documentaries about pollinators lately and finally felt inspired to take the plunge, but your step-by-step breakdown on transferring the nuc made the whole process feel way less intimidating. If you need I found netflix phone number for info. I especially loved your advice to "just enjoy it" - on my first inspection last week I was so nervous I forgot my hive tool in the house, but standing there watching them all work actually gave me that calm moment you mentioned. Your tip about using the old nuc for swarm control later is genius and something I hadn't considered at all. Thank you…